Category: Uncategorized

  • How to Pack a Suitcase Efficiently

    How to Pack a Suitcase or Bag Efficiently

    Most of us dread packing. Trying to figure out what to take and how much is not always easy. Besides, there is always so much on your mind when going on a trip.

    1. Bring a carry-on. Use a carry-on similar to the ones the flight crews use. A carry-on is sufficient on most short trips. You do not have worry about losing a bag and don’t have to wait around for the luggage to be unloaded.

    2. Address labels or business cards are handy to place on luggage in case they get lost. Include email address on cards and labels.

    3. Baggies, two sizes. Great for laundry that hasn’t dried, damp face cloth, etc.

    4. Belts, accessories (jewelry).

    5. Flight Bag. This is a small, lightweight carry-on that can be folded flat and takes practically no room when it is placed on the bottom of your bag. Tour groups often give them to their clients.

    6. Alarm clock.

    7. Clothing. Put half in carry-on and half in your partner’s bag if traveling with someone. If one of your bags is lost, you still have half your clothes.

    8. Cosmetics

    9. Ear Plugs are great for flying in small commuter planes, which are very noisy.

    10. Electric plug adapters. Different parts of the world use different plugs, so carry adapters if you have any electric appliances with you.

    11. Flashlight. Carry a small flashlight when going to countries that might have erratic power or on safari. Also comes in handy during the night if you have to get up and don’t want to disturb traveling companions.

    12. Feminine Protection. Sometimes difficult to explain to someone in sign language exactly what you want. Also, these items may be different from what you are used to.

    13. Gloves, if necessary, cotton or heavy depending on destination.

    14. Hair dryer, with dual-voltage capability, unless you have an adapter. Take only if there’s doubt that one is available in the hotel.

    15. Insect repellent when going to an area that will be buggy.

    16. Needle, thread, safety pins, rubber bands, other related items.

    17. Night clothes, plus robe and slippers, if necessary.

    18. Shower items such as cap, shower sandals (flip-flops).

    19. Shoes. Take an extra pair for walking.

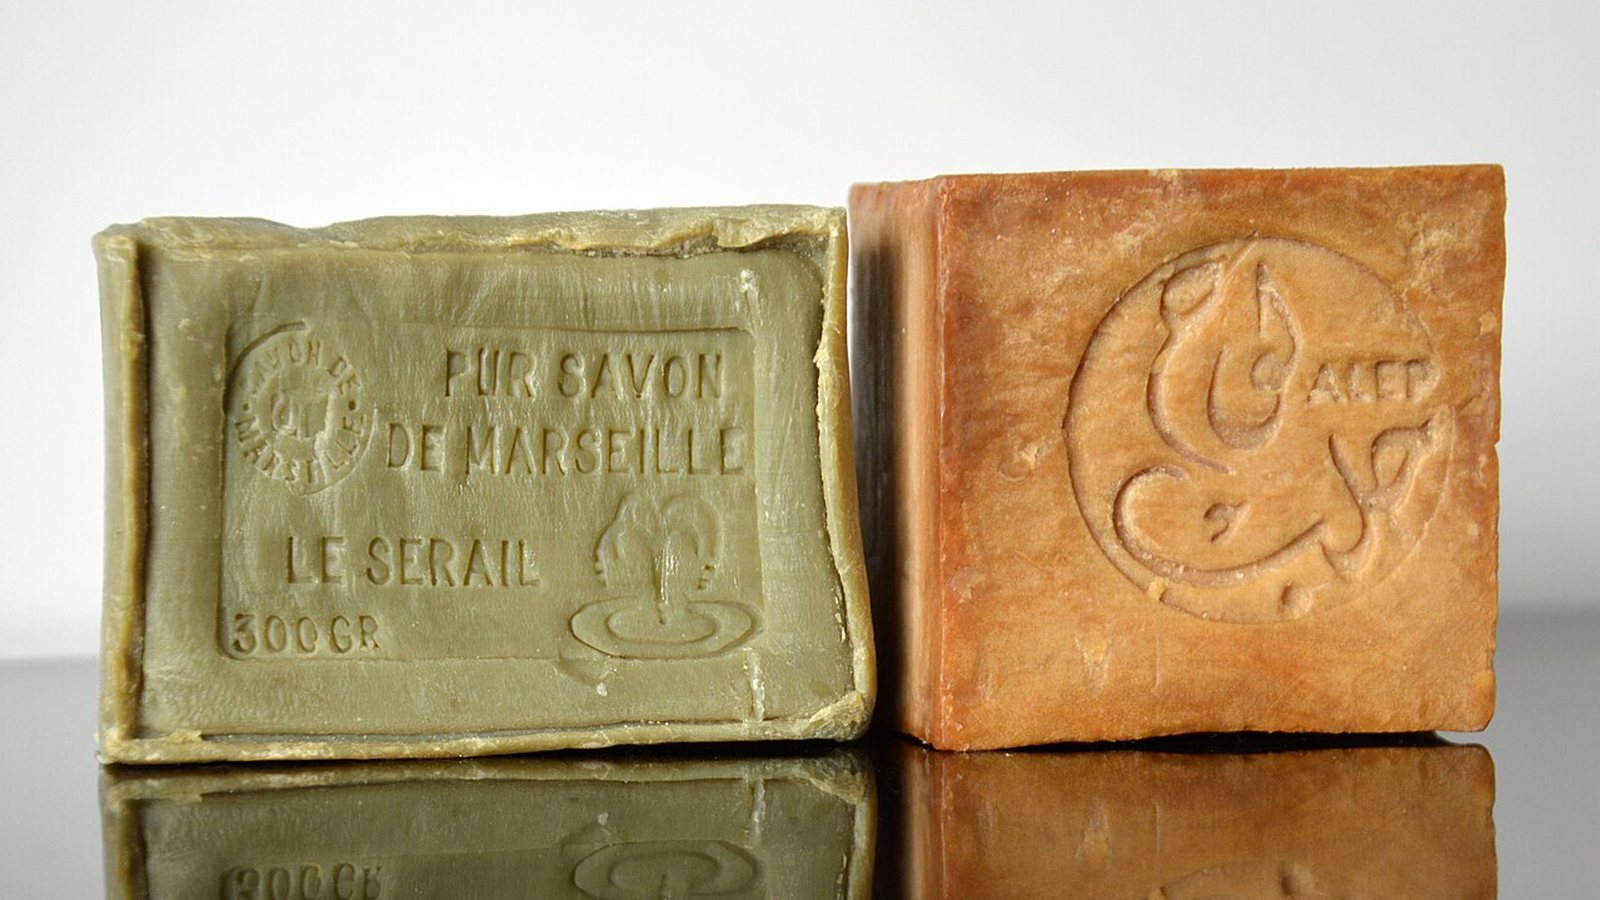
    20. Carry a small hotel-size soap bar to some areas of the world where the soap may be quite harsh.

    21. Sweater or light jacket. Comes in handy where air-conditioners are turned very low.

    22. Tights. A simple solution for very cold areas. They take very little room but provide much warmth.

    23. Toilet tissue. Some countries use tissue with the texture of newspaper. Remove center core and press flat. Take very soft tissue and use in place of Kleenex.

    24. Tooth brush cap. A cap for over the brush takes much less room than conventional tooth brush holder.

    25. Travel data. Don’t forget maps, travel books.

    26. Underwear.

    27. Vitamins.

    28. Wet Ones, or something similar for cleaning hands.

    29. Medication.

    30. Small mirror.

    31. Money.

    32. Passport.

    33. Pen.

    34. Scissors/knife (collapsible).

    35. Tickets, Travelers Checks, Vouchers.


    Headed Out on a Trip? Learn How to Pack Efficiently First!

    When preparing for a trip, packing luggage is a common problem. Here arises the importance of learning how to pack. It is true that you want to be well equipped when you are out for a tour, but never pack so much, that it is hard to carry around your own luggage. Considering packing is an art, you must first learn by knowing what is most essential while you are out on a trip.

    No luggage? No problem! Websites like RentLuggage.com allow you to pick out luggage that specifically fits your needs. Whether you require a travel bag, a suitcases or even bags to move sports equipment, you can find a suitable rental to handle any of your needs.

    Some steps of how to pack

    Learning how to pack is also an art, which sets the tone for your trip. If you are a person who loves possessing lots of clothing and owning several cosmetics on your trip, you might end up packing too much, but to ease up your load and luggage, here are some tips on how to pack so that you can fit everything in your luggage.

    The first step of learning how to pack like an expert is simply to consider how many days you are going to travel, and pack according to that. Make a checklist of every item that you plan to take on your trip like foodstuffs, clothing, maps, reading material etc. Review your checklist to determine, whether there are any items that you can remove to lighten your load.

    Secondly, you need to follow the roll technique to pack clothing. Here you need to lay three or four items on top of one-another and roll them up. This will save space and prevent wrinkles. For wrinkle prevention, you can also place a sheet of heavy tissue between items of clothing before rolling.

    As a third step, you can buy a travel size container or you can even use space saving bags, which are easily available. These bags are good for placing your space and prevent your clothes from being crushed.

    Next, enclose the toiletry containers in airtight plastic bags to prevent contents from spilled into your suitcase in case of a leak. Wrap socks or pajamas around breakable items to cushion them.

    Finally, you need to think conservatively. You should not carry items like toothpaste, soap, shower gel that are easily achievable or may be provided by the hotel. These trifle things can add up to the burden. Remember over anticipating what you need, can be as frustrating as leaving something at home.

    Therefore, as a touristy traveler if you were concerned about how to pack your luggage, worry not; these stated steps would surely add some space in your rook sack or travel luggage, helping you to have a hassle free trip.
  • Christmas Crafts: Stuffed Tree, Stuffed Snowman and Gingerbread Ornaments

    Stuffed Christmas Tree – Warm your Home with Cozy Holiday Charm

    This is a nice little Christmas tree that can be made for table top decorations. It can be made as a gift or for use in your own home. The tree is easy to make, costs very little in material, and will last for many Christmas seasons.

    Materials:

    ¾ of a yard of material of your choice.

    One bag of polyester fiberfill.

    Needle and thread.

    Scissors.

    Tree decoration – ribbon, small ornaments or bells.

    Glue gun.

    1. Make a pattern in the shape of a Christmas tree.

    2. Fold the material in half, long ways, with the right sides of the material together. Then fold the material, short ways, in equal sections of 1/3. This will give a material pile of six sections.

    3. Place the pattern on the material and pin the pattern to the material.

    4. Cut the pattern out along the edge.

    5. Remove the pins and place the pattern aside.

    6. Take two pieces of the cut out pattern and put two sides of the correct side of the material together and pin. Follow this same procedure for the remainder of the material pieces. You will end up with three separate pinned material pieces.

    7. Begin sewing the tree panels together. Start from the bottom and sew upwards leaving a three inch opening at the bottom. Follow this procedure for all three panels.

    8. Once the panels are sewn together, turn them inside out.

    9. Press, with an iron, the bottom edges inside, so that they form a complete tree. The edges that were ironed in, will be stitched by hand once al the panels are sewn together.

    10. Place all three panels together and pin. Make sure that they are even with each other.

    11. Sew all three panels together starting from the bottom of the base of the tree sewing upward.

    12. Now it’s time to stuff the tree. There are six open panels, at the bottom, which all need to be stuffed with the fiberfill. A wooden spoon is a good tool to use in stuffing the panels.

    13. Once a panel is stuffed, sew it by hand and close the opening. Follow this procedure for all six panels.

    14. Now that your tree is completed, decorate it in any fashion imaginable. Be creative!! Happy tree trimming.


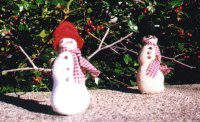
    Easy to Make Stuffed Snowman – Decorate Your Home with Cheer!

    Making crafts are a wonderful way to spend a day at home. They bring out the creativity in a person and give great satisfaction when completed. Here is a little snowman you can make on one of those days at home. This little guy doesn’t take very long to make and the materials needed should only cost pennies. Once he is completed, he can be an ornament on a Christmas tree, used to decorate gifts, or he can be put on the refrigerator by gluing a magnet to his back.

    Materials

    Two 5″ X 5″ pieces of material of your choice (white’s always good) for the body of Mr. Snowman.

    1 sheet of black felt.

    1 tooth pick.

    5 small pieces of broken up asphalt (just pick them out of a driveway paved.

    2 twigs shaped in a “Y” (hands).

    Small amount of fiber fill to stuff Mr. Snowman.

    1 strip of material of your choice for the scarf. It should measure about 1″ X 8″ (fringe the bottom of the long edges).

    Glue gun.

    Needle and thread.

    Orange paint (you can use nail polish, if you can find orange that is).

    Elmers glue.

    Scissors.

    Pointed object as in a nut opener or a pen that has run out of ink.

    1. Order the pattern, or make your own.

    2. Take the material and put the right sides together facing each other. Place the pattern on the material, pin it, and cut the pattern out.

    3. Remove the pattern and re-pin the material. Sew the material together, 1/2″ from the edge of the material leaving a 1″ opening at the top of the head. This is where the fiber fill is stuffed to shape Mr. Snowman.

    4. Once the material is sewn together, turn the material inside out. A wooden spoon is a good tool to use to push the material inside out through the head opening. Once the material is inside out, begin stuffing the fiber fill via the head opening. The wooden spoon can be used here too to push the fiber fill into the body. Once Mr. Snowman is completely stuffed, sew the opening at the top of the head closed.

    5. Cut the pattern out for the hat. The hat can be a little tricky to glue together, but be patient and it will turn out fine.

    6. Using Elmers glue, put a thin coating around the perimeter of the small circle (top of the hat). Take the strip of black felt and glue the long edge to the perimeter of the hat going all around. Then glue the edge down together of the long strip. This will form the top hat.

    7. Now put a thin coat of glue around the perimeter of the bottom of the long strip (top hat), which is now circular. Place the top of the hat on the brim (larger circle). Try to line it up even so the brim is the same size all around. Let dry.

    8. Once the hat is dry, using a pair of scissors, cut a round opening in the bottom of the hat, so that it can be placed on Mr. Snowman. The easiest way to do this is to bend the hat in such a way that an “x” is cut out. Then simply insert the scissors in the opening and cut around.

    9. Cut the tooth pick to measure about 1/2″ and paint it orange. Let it dry.

    10. Time to decorate Mr. Snowman. With the pointed object, push a hole into the side of the middle body part between the seem. The opening is being created so that the arms (twigs) can be easily inserted.

    11. With a hot glue gun, put a small amount of glue in the opening and insert the arm. Follow the same procedure on the other arm.

    12. Now glue the top hat onto Mr. Snowman.

    13. Using judgment, decide where the nose should go. Use the pointed object and create a small hole opening for the nose. Put a small amount of glue in the opening and then insert the tooth pick.

    14. All that’s left to do is glue three buttons on the center base of Mr. Snowman and glue his two eyes on (us the small pieces of asphalt). Wrap the scarf around his neck and tie. To keep the scarf from moving around, glue it to the body of Mr. Snowman.

    15. To hang him from a Christmas tree, simply sew a loop into the top of the hat and use an ornament hook. Another idea is to glue a small magnet to the back of Mr. Snowman. This way he can be attached to the refrigerator at home or on a file cabinet at work.


    How to Make a Gingerbread Man Ornament

    These little men even smell good! This is the perfect ornament every Christmas tree should be trimmed with. They are easy to make, but are a little expensive. The reason being, the cost of the cloves. If you don’t mind spending a little extra money to create a wonderfully smelling ornament, this is the way to go.

    Materials Six Tbs. Applesauce.

    Ten Tbs. Cinnamon.

    One Tsp. Cloves .

    One Bundle of string.

    1. Combine all ingredients to form a dough.

    2. Roll out the dough to about 1/8th of an inch in thickness.

    3. Cut the dough out with a gingerbread cookie cutter.

    4. Slightly grease a cookie sheet with PAM, and then place the gingerbread men on the cookie sheet.

    5. Poke small holes in the hands of the gingerbread men with a tooth pick to create openings.

    6. Bake at 120 degrees for approximately one and a half hours.

    7. Turn off the oven and leave the gingerbread men in the oven over night to allow them to dry.

    8. Once dry, begin to decorate your gingerbread men. Use your Imagination!

    9. Now it’s time to string these little guys together. Insert the string into the hand holes and tie a knot behind the hand. Do this for every hand until you get to the end hand.

    10. Once you get to the end hand, pull the string all the way through. Form a loop and then tie the loop at the end of the hand. Leave about three inches of string extending from the end of the hand and then tie the string off at the end with a knot.

    11. You can make the ornament as long as you like. Or you can make only three gingerbread men tied together, which makes a great Christmas gift for a friend or a work associate.  

  • Seasonal Crafts: Easter Hat, Vine Wall Hanging and Decorative Bottles

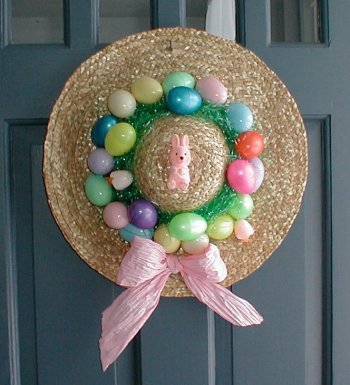
    Easter Hat decoration – a Fun and Easy Craft for Kids.

    Easter is a time for prayer and celebration. It’s also a time to rejoice for the coming of spring. To help you celebrate, decorate your home’s front door with this very cute Easter hat.

    Materials

    1 Straw hat.

    12 Multi colored plastic Easter eggs.

    2 Feet of ribbon.

    Easter basket grass.

    1. With a glue gun, glue the Easter basket grass all around the base of the hat.

    2. Glue the plastic eggs on top of the Easter basket grass. Be sure to glue the eggs in various positions.

    3. Form a bow and glue it on the bottom of the hat.

    4. Hang the Easter hat on the front door.

    5. Use your imagination and decorate the hat with other Easter and/or spring items like flowers, bunnies or any type of decoration that fits the theme.


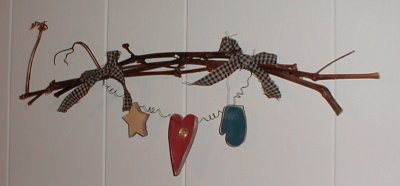
    Create a Beautiful Vine Wall Hanging.

    Here’s a cute little craft that’s sure to add a little country atmosphere to a bare spot in your home.

    Materials

    4 bounces on grape vine twigs approximately one foot long.

    3 wooden decorative ornament pieces.

    2′ of wire.

    2 bows made out of a country fabric pattern.

    Brown thread.

    Glue gun.

    Drill with bit.

    Nail file.

    1. Secure the vines with thread on each end.

    2. Paint the wooden ornaments and let dry.

    3. After the ornaments are dry, drill a small hole into the tops of each ornament.

    4. Using a nail filer, file the ends to give an antique look.

    5. String the ornaments with the wooden pieces.

    6. In-between each wooden piece, circle the wire around a pencil to form a spiral effect.

    7. Secure the wire ends on each end of the grape wine.

    8. Form the fabric into bows.

    9. Glue the bows on each end of the vine.


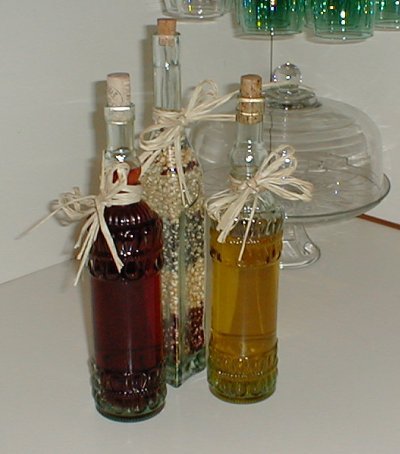
    How to Make Decorative Bottles

    Oil and Vinegar. These two condiments are frequently used, so why not keep them within easy reach in your kitchen. They will also save you some cabinet space. The glass bottles can be found at stores that carry kitchen items.

    Materials

    2 decorative glass corked bottles.

    1 yard of raffia.

    Oil.

    Vinegar

    1. Fill one bottle with oil and the other with vinegar.

    2. Cut the raffia in half leaving two 1 ½ foot pieces.

    3. Take one strand of raffia and rap it around the neck of the bottle and then form a bow.

    4. Repeat this step on the other bottle.

    5. Place the bottles on your kitchen counter top for display and easy access.

    Now anytime your making a salad, or a food dish that requires oil or vinegar, they will be right at your finger tips. Not to mention they give your kitchen a feeling of home. Also makes a nice popcorn display.

  • How to Lower Your Grocery Bill

    How to Lower Your Grocery Bill

    Lower Your Grocery Bill – Quick Tips to Fix Your Grocery Buying Habits

    The average household with 2.5 children and 3/4 of a dog can spend up to 10% of their total expenses on groceries. Fortunately, if you are a smart shopper, the supermarket is a great place to save.

    1. Go to the market only once a week. Shoppers who run to the store frequently buy more impulse items.

    2. Try to shop only when you feel rested and alert. You’ll be better equipped to calculate bargains and watch for errors at the checkout counter.

    3. Bring a pocket calculator. Use it to keep a running total of what your spending. That way you will not get a nasty surprise at checkout time.

    4. Shop at one place. Unless the bargains elsewhere are great, stick to one store. Running around all over town costs dollars and minutes.

    5. Shop midweek. That is when the sale items are likely to be in stock. You will also zip through the store with the greatest of ease. Try shopping early, late, or at mealtimes.

    6. Look for specials, but be careful. Search high and low for bargains, literally. Most times, best buys are placed inconveniently on high or low shelves. Eye level space is reserved for premium-priced goods.

    7. Compare UNIT price, not price. The unit price is the price divided by weight or volume. For example, two items cost the same, say $3.99, but one is a 12 ounce package and the other is a 16 ounce package. The unit price will be lower on the 16 ounce item (25¢ per oz), as compared to the 12 ounce item (33¢ per oz).

    8. Be willing to try house and generic brands and sizes. It may be worth the difference in price if the item tastes exactly the same or very close to it.

    9. Pick up quantities of staples when the price is low. But do not go hog wild. For quantity buying, you need storage space and you must be able to use the items within a reasonable time. Get the large economy size when the unit price indicates that it is really economical.

    10. Coupons, Coupons, Coupons. Or a preferred customer card. You can easily save 10% or more by using your coupons or customer card.

  • How to Make Soap

    How to Make Soap

    It’s Easy To Make Soap – Soap Making Recipes and Instructions

    Here is an easy way to make some homemade soap from ordinary vegetable shortening. Although, you will also need sodium hydroxide and tricaprylmethylammonium chloride.

    1. Weight 10 grams of vegetable shortening (Crisco) into a small beaker.

    2. Heat this over a steam bath until it melts.3. Stir in 4.5 mL of about 25% aqueous sodium hydroxide. 4. Add 2 drops of tricaprylmethylammonium chloride.

    5. Heat the mixture on the steam bath and continue to stir for about 20 minutes. Make sure all of the oily globs disappear. 6. Cool the mixture.

    7. Add 3 mL of water.8. Use a flat stirring rod to break up the soap particles.

    9. Separate the soap from the solution using vacuum filtration.

    10. Wash the soap on the filter with ice cold water.

    11. Let the soap dry.

    12. Use the soap to wash your feet.

  • How to Make Nylon

    How to Make Nylon

    What was the first synthetic polymer fiber ever synthesized by man? If you did not say Nylon, you are not paying attention. That’s right, Nylon was first synthesized in 1935 by Wallace Carothers and his team at E.I. du Pont de Nemours and Company. DuPont announced it to the public in 1938. And the world has never been the same.

    1. In a 150 mL tall-form beaker, dissolve 1.0 mL of pure sebacoyl chloride in 50 mL of methylene chloride (careful, suspected carcinogen).

    2. In a different, small beaker, combine 10 mL of 1M aqueous sodium hydroxide with 15 mL water.

    3. To the small beaker solution, stir in 0.55 grams of pure 1,6-hexanediamine until it dissolves.

    4. Now take the tall-form beaker and tilt it. Slowly pour the contents of the small beaker down the side of the tall beaker without mixing the layers.

    5. A polymer film should form at the interface between the two layers.

    6. Take a long wire and twist a hook at one end.

    7. Gently grasp the center of the film with the wire hook.

    8. Pull up the film and wrap the end around a cardboard paper towel tube.

    9. Slowly rotate the paper tube and wind it until all of the film comes out of the solution.

    10. Unwind the Nylon into a beaker containing 100 mL of 50% ethanol. Stir gently to wash the Nylon.

    11. Pour the ethanol out of the beaker. Remove the Nylon and place on a paper towel to thoroughly dry.

    12. Repeat several times to gather enough Nylon to make panty hose.

    W.H. Carothers – Invented Nylon

  • Greek Spinach Pie (Spanakopita)

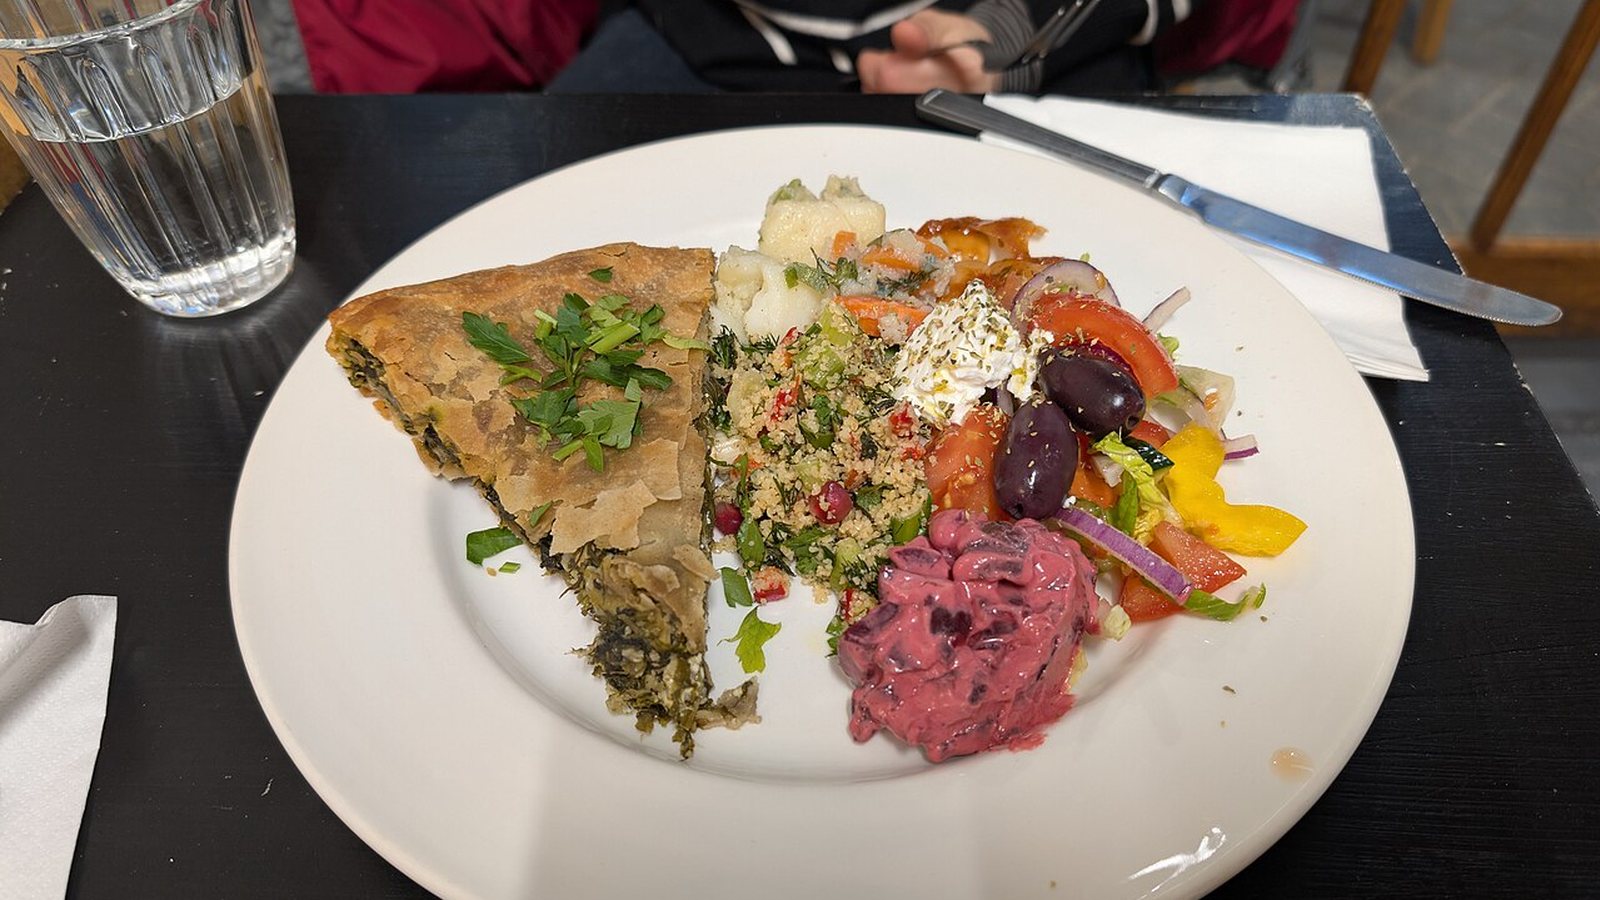
    Greek Spinach Pie (Spanakopita)

    Spinach Pie or Spanakopita: An Easy and Delicious Vegetarian Pie Recipe

    Here is great Greek recipe for spinach pie. The Greeks like to call it spanakopita, which means spinach pie.

    Ingredients:

    4 pkgs. frozen chopped spinach.

    1 lb. Ricotta cheese.

    1 lb. Feta cheese, crumbled.

    ½ c. Parmesan cheese.

    16 phylla (Phyllo dough).

    1 c. butter, melted.

    4 eggs, beaten.

    1 med. onion, chopped.

    4 tbs. vegetable oil.

    1 tsp. dill, chopped.

    1 tsp. salt.

    ¼ tsp. pepper.

    1. Allow spinach to stand at room temperature to defrost completely.

    2. Squeeze spinach dry and combine with cheeses, onion, eggs, oil, salt, pepper, and dill.

    3. Arrange 8 phylla, each brushed with butter, in a greased pan 10 x 15 inches and cover with spinach filling.

    4. Cover top with 8 more buttered phylla. Seal edges to retain filling.

    5. Brush top with melted butter. Cut through top layers to mark pieces into triangles.

    6. Bake in 350 degree oven for about 45 minutes or until golden brown.

  • Greek Avgolemono Soup (Chicken, Lemon and Egg Soup)

    Tasty Greek Avgolemono Soup Recipe

    Here is the recipe for that famous and delicious Greek Avgolemono soup (a.k.a. Greek soup, lemon soup, chicken and lemon soup, chicken and lemon and egg soup). It may be known by different names, but we often just call it THE soup.

    Ingredients:

    8 cups chicken broth.

    3 medium eggs.

    1/2 cup rice.

    Juice from two lemons.

    Salt.

    1. Bring chicken broth to a boil. Salt to taste.

    2. Add rice, cover, and simmer for 20 minutes.

    3. Remove from fire.

    4. In a blender, beat the three eggs, slowly add the lemon juice to the eggs. 5. Add one cup of chicken broth, do not stop blending. The constant blending is the secret to prevent curdling of this delicious soup.

    6. When the eggs and broth are well mixed, pour this mixture back into the remaining broth and rice.

    7. Stir well over heat, but do not allow to boil.

    Serves 6

  • Carrot Cake

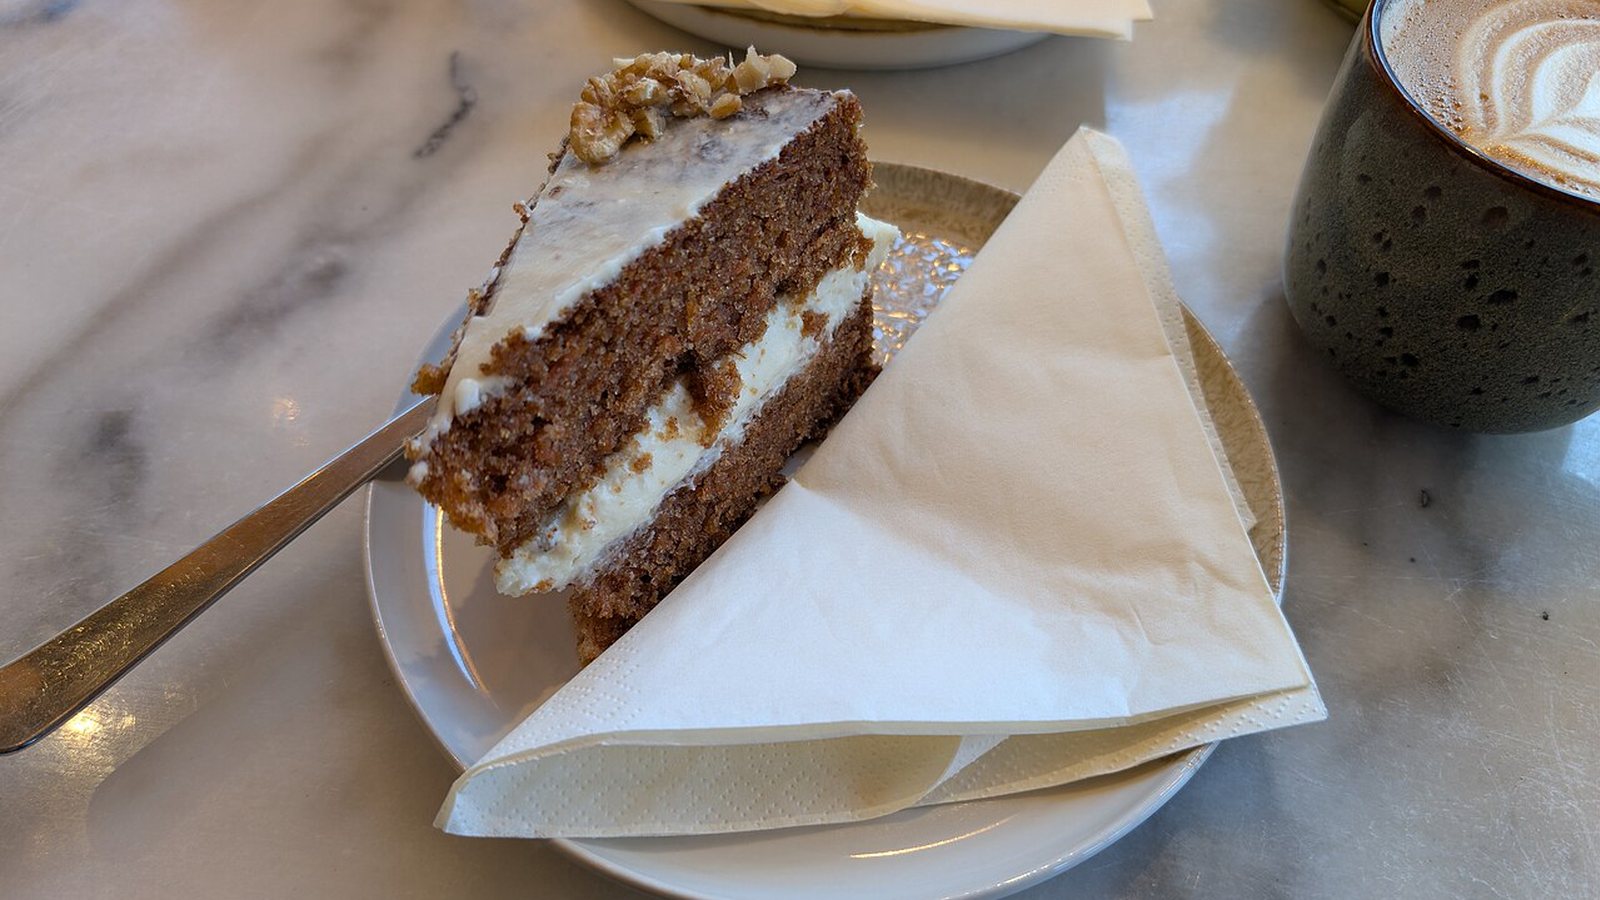
    Carrot Cake

    Moist and Flavorful Carrot Cake Recipe

    Carrot cake lovers are always looking for a really good recipe for, what else, CARROT CAKE! Well, here is a great one!!

    Ingredients:

    1 cup sugar.

    2 cups flour.

    1 tsp. salt. 1 tsp. cinnamon. 1 cup brown sugar, packed. 1 tsp. baking powder. 1 tsp. baking soda.

    3 cups finely shredded carrots (a food processor is good for this job).

    1 1/2 cups vegetable oil. 2 tsps. vanilla. 4 large eggs. 1/2 cup chopped nuts (walnuts are good, but any nut will do. 1/2 cup raisins.

    1. Grease and flour a 13″ X 9″ pan.

    2. Stir together dry ingredients.

    3. Now add to the dry mixture, the carrots, eggs, oil, and vanilla.

    4. Beat about 2 to 3 minutes until well mixed.

    5. Stir in the nuts and raisins.

    6. Bake at 325 degrees for about 50 to 60 minutes.

    7. Cool on a wire rack.

    CREAM CHEESE FROSTING

    One 3 oz. package of cream cheese. 1/4 cup butter.

    1 tsp. vanilla. 1 1/2 cups powdered sugar.

    Once the cream cheese is at room temperature, mix all ingredients together. You are now ready to frost your DELICIOUS cake.

  • How to Make Baklava

    How to Make Baklava

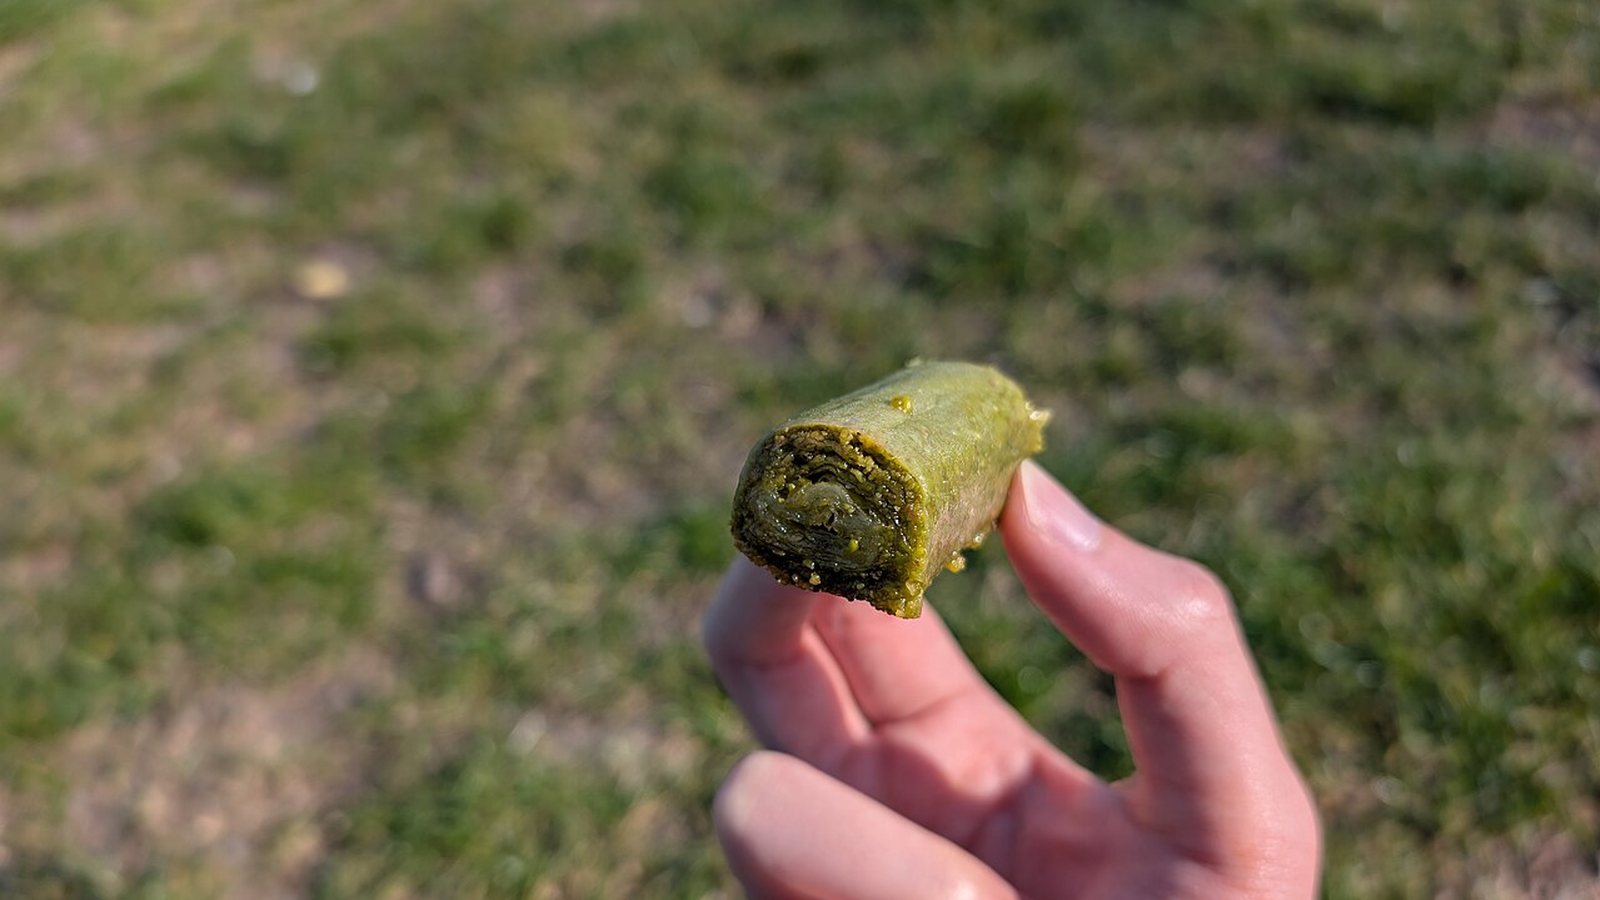
    Easy and Delicious Gormet Baklava Recipe

    Baklava has been a favorite Greek pastry for centuries. It is easy to make and is a wonderful holiday pastry to serve your guests. However anytime is time for Baklava, birthdays, Christmas, Thanksgiving, if you’re having company, or just if your in the mood for something sweet. Try it, it will become one of your favorite pastry recipes.

    Ingredients:

    1 lb. Phyllo dough.

    4 to 5 cups walnuts, chopped coarsely.

    ½ cup sugar.

    ¼ tsp. ground cloves.

    1 tsp. cinnamon.

    ¾ lb. sweet butter.

    1. Combine nuts, cinnamon, cloves, and sugar.

    2. Melt butter in a saucepan.

    3. Use pastry brush to brush inside of a 14 X 10 ½ inch pan with melted butter. 4. Line bottom of pan with one piece of Phyllo dough. Fold under excess Phyllo.

    5. Alternate sides with each piece of Phyllo, brushing the top of each layer with melted butter.

    6. Repeat five (5) times, making five layers.

    7. On the 6th sheet, sprinkle evenly with nut mixture.

    8. Continue until all nut mixture is used and last six (6) buttered sheets of Phyllo form top crust.

    9. Use a sharp knife to cut into diamond shapes.

    10. Bake at 300° F for about 1 ½ hours or until lightly brown.

    The Syrup:

    2 ½ cups of water.

    3 cups sugar.

    3 tsp. lemon juice.

    1 tsp. vanilla.

    1. Combine syrup ingredients. Boil syrup for about 10 minutes and then allow to cool.

    2. Pour cooled syrup over hot pastry.

    3. Each individual Baklava slice can be served on a bake paper cup (cup cake cups). During the Christmas holidays, a gold or sliver bake paper cup is very festive and makes a beautiful display. Martha Stewart would be proud. Happy baking!