Category: Uncategorized

  • How to Clean Your Computer and Keyboard

    How to Clean Your Computer and Keyboard

    Learn how to clean your computer.

    Be nice to your computer by giving it a good cleaning every once in awhile.

    1. A dust free area is of utmost importance.

    2. Start with the monitor, which is a virtual magnet for lint and dust particles. Use a screen cleaner made for monitors, available at your local computer store, or a soft, lint-free microfiber cloth lightly dampened with water. Do not spray liquid directly on the screen, and skip rubbing alcohol on the screen, since it can damage anti-glare coatings. Screen cleaners are designed to remove dust, lint, oily fingerprints, and other gunk without scratching or streaking the polarized surface.

    3. Give your keyboard a regular dusting by turning it upside down and blasting between and under keys with a can of compressed air. Wipe off the keys with a slightly damp cloth or cotton swabs. Never spray any liquid cleaner directly on the keyboard.

    4. Once a month, examine the fan on the back of the computer. A buildup of dust and lint on the fan is a sign that it’s also inside your computer.

    5. Unplug the system, pop the top and clean the dust out. Use a mini vacuum made specifically for cleaning computers which you can find at your local store or catalogue. Do not touch any of the chips and other electronic components. A can of compressed air is very helpful to clean out areas where your vacuum cleaner can’t reach. Do not use any liquid cleaner inside your system. Be careful not to knock any wires loose inside the case. You won’t have to do this to your computer more than once or twice per year.


    Learn how to clean your keyboard of dirt and grime

    Just like there’s more than one way to do so many things, there’s more than one way to clean a computer keyboard, too. Sometimes how to clean keyboard or its components the best depends on how serious the dirt.

    Many computer users rely on a stash of specially designated “how to clean keyboard” supplies that include compressed air that comes in an aerosol can, a soft cloth for wiping down the keys and surface areas, and a nonabrasive cleaning fluid formulated for cleaning plastics, such as Endust for Electronics. People who suffer from dust allergies also like to have a dust mask handy, too.

    If your keyboard came with an owner’s manual, check the manual’s section marked how to clean keyboard area before trying anything else first. Each manufacturer operates differently and following your keyboard manufacturer’s recommendations will keep your keyboard tapping away happily for the longest duration. You’ll also learn from the manual what, if anything, you do to clean the keyboard might affect any warranty issues in effect.

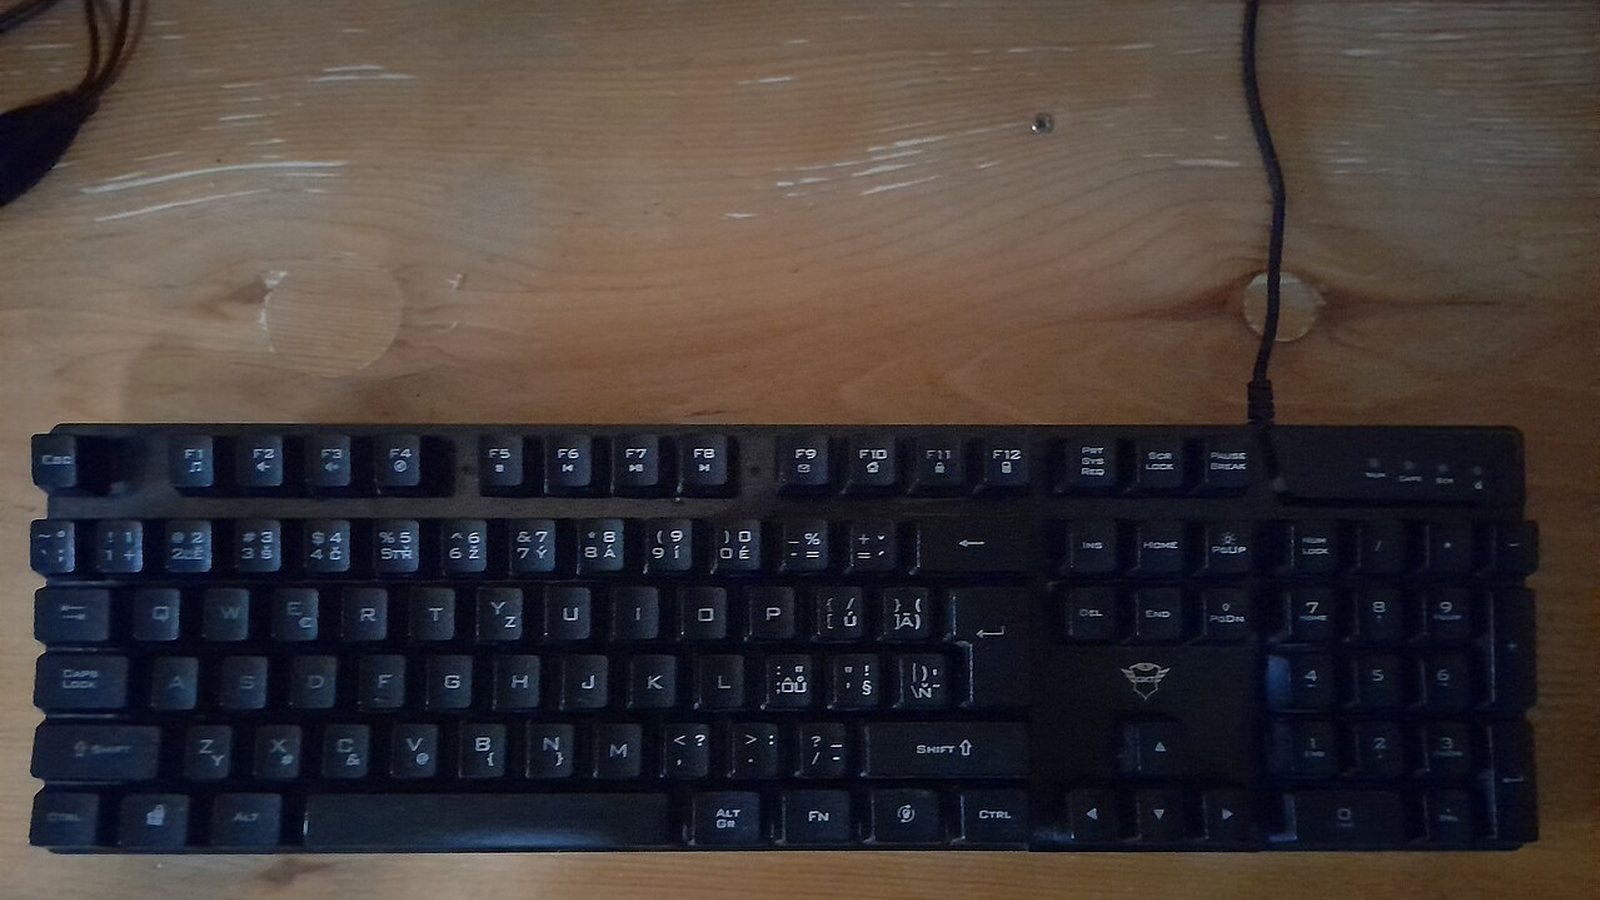
    Start your how to clean keyboard regimen by shutting down your computer and then disconnecting the keyboard. You’ll probably want to move the keyboard away from the rest of the computer, too, just to make sure nothing spills, sprays, or becomes dusted onto other parts of your computer system.

    Begin the how to clean keyboard process by spraying compressed air into the spaces between the keys. Use the straw-like wand that comes with the compressed air to get into the tightest spots. Turn you keyboard upside down and shake away any dust that’s come dislodged due to the spray from the compressed air.

    Now put a small amount of cleaning fluid onto the soft cloth and gently polish all the exterior parts of the keyboard, keys and all. Allow the keyboard ample time to dry before reconnecting it to the computer. Some people suggest waiting until at least the next day to make absolute certain everything is dry before reconnecting to the computer and starting back to work again.

    Other computer users say how to clean keyboard parts best is to pop off each key, using a screwdriver, and gently wiping away any dust or grime underneath with a lint-free cloth treated with some rubbing alcohol. A Q-tip works nicely this way, too.

    Everyday dust and dry debris can impair the functionality of your keyboard but these are relatively easy to clean. Spills, especially sticky spills, may mean the end of your keyboard altogether. If you do spill liquid onto your keyboard, disconnect it immediately and turn it upside down so the liquid can drain. If the spill is sticky, you may try running a little water over it but this is a risky bet. It’s better to just remember to keep all liquids as far away from your computer as you can get them.

  • How to Play the Guitar

    How to Play the Guitar

    Learn How to Play the Guitar Quickly

    Guitar is a wonderful instrument to play, and when its sweet melodies touch your ears, you just feel restless to learn how to play the guitar. Guitar is associated with the most popular musical genres of the world. If you wish, you can play any song with your guitar. However, for this you of course need to know how to play the guitar. Playing guitar is real fun. You will just love to stick onto its strings almost the entire day. Guitar needs practicing, and if you want to impress someone, it will certainly help you in doing that.

    Some people think that guitar is quite tough to play. However, if you are passionate about guitars, then just go on practicing. Learn how to play the guitar with the help of notations provided to you. You can learn guitar with the help of the following steps:

    First Step of playing the guitar

    Get hold of the acoustic guitars because they are one of the best to learn. As the strings are bigger and contain more tension, it will help you to build callouses as well as finger strength. Poor quality guitars often lead you to bad habits. Therefore, always go for the electric guitars because they not only help you to shed off your bad habits, but also allow you to capture any song and play it through.

    Second step of playing the guitar

    It is very important for you to tune your guitar before you start playing. Sometimes the strings get loosened that produces a poor quality sound. So tighten up the strings first and get going.

    Third step of playing the guitar

    One of the best ways of how to play the guitar is by choosing picks. There are generally three types of picks – Heavy, Medium and Thin. If you are a beginner, choose the medium or the thin picks. Most of the heavy metal guitarists prefer heavy or the thick picks. The guitarists don’t prefer the thin picks, and these are generally not preferred because they create a brighter tone than the heavier ones.

    Fourth step of playing the guitar

    To play a guitar the most important things are the chords. Learn the C, D, G, E, and A chords first. After you learn these chords, you can go for the barre chords. The entire lesson is quite interesting that will help you to learn how to play the guitar.

    Fifth step of playing the guitar

    Try to learn solos because that helps a lot to get familiar with each and every string. No doubt, it is a bit difficult to learn, but once you are through, you can be a great guitarist.

    Sixth step of playing the guitar

    You know that practice makes a man perfect. Therefore, the more you practice, the more you will learn how to play the guitar.

    Learn how to play the guitar from several musical books on playing guitars, which are readily available.


    Learn How to Play Guitars with These Easy Tips

    So, you want to learn how to play guitar, do you? Success depends on only three things – practice, practice, and practice. But it’s the perfect practice that leads to perfection in playing.

    It’s for this reason that learning how to practice effectively is the key to learning how to play the guitar most successfully. It’s important to develop some good practice habits right from the very beginning. And you’ll want a few things on hand to make practice go as smoothly as possible.

    For many people, how to play guitar to the best of their ability depends upon the picks used. Picks come in several different sizes, from extra thin to extra thick. Have several sizes on hand to experiment with, find out which is most comfortable for you.

    Some people can play guitar by ear, without learning how to read music, but this trait is rather rare. For the rest of us, how to play guitar, or any musical instrument, means we’ll have to know at least a little bit about reading music. You’ll want some sheet music to get the most out of your practice sessions but choose simple tunes in the beginning. Start slow with them, become comfortable playing them faster until you reach the correct tempo, and graduate to more complicated pieces as your knowledge and comfort level advance.

    It’s impossible to learn how to play guitar effectively with a guitar that’s out of tune. It’s important to have a tuner for your practice sessions and to use it often.

    Sometimes playing a guitar sounds different than hearing a recording of how to play guitar, especially when it’s you on the recording. If it’s at all possible, record your practice sessions. You’ll be so focused on the mechanics of playing that it’s likely you’ll miss some of the errors (and some of the really good stuff) that you’ll catch when simply listening to your music played back later.

    And don’t get discouraged when strings break when learning how to play guitar. Keep plenty of extra strings on hand so you can get the full benefit from a practice session.

    Another good idea is to get yourself a “how to play guitar” handbook that identifies for you all the parts of the guitar and introduces you to the basics of picking, tuning, and chords. This is an excellent option especially for guitar buffs learning on their own.

    Don’t let the pain of tender fingers stop you from learning how to play guitar, either. It takes practice to make perfect but it also takes practice to build up some calluses on the fingertips that will make playing less painful and more perfect. Don’t play until your fingers bleed either. That’ll just prolong the time until the next practice session. Start in short sessions and add time as your fingers build strength.

    And don’t be discouraged about how much time it takes to learn how to play guitar. The professionals approach practice like the rest of us do our jobs. After all, the guitar is their job and they devote many hours every day, as many as ten or more hours, to perfecting their art.

    Learning how to play guitar should be pleasant and rewarding. Start with an inexpensive guitar and short sessions and work up to perfection. Two of the most important elements to excellent guitar playing are the desire and the determination to do so. And practice, practice, practice.

  • How to Clean Up After a Fire

    How to Clean Up After a Fire – Basic Tips to Help Get your Home Back to Normal

    Once the blaze is out and the firefighters have left, you will have to decide quickly whether or not you can do the clean-up work yourself. If the damage appears extensive, leave everything as is. Then call your insurance agent immediately so the damage can be documented and professionally repaired. But if the fire was limited to one room and damage is minimal, you can probably proceed on your own.

    1. Use a shop vacuum to remove the dry soot and any chemical residue left from fire extinguishers.

    2. Open windows and doors so fresh air can circulate through the house and dissipate the smell of smoke. Use a room deodorizer to mask the smell until it’s gone.

    3. Clothing, carpets and other furnishings might require professional cleaning to eliminate the smoke odor.

    4. Dry-cleaning sponges are ideal for removing loose soot particles from latex paint, blown ceilings and acoustic tiles. They’re available through cleaning and paint supply outlets for about $10 to $20. Do not use household cleaners on these surfaces. The sponge should be used dry. Wipe the ceiling first, since debris tends to drop downward. Then work on the walls, moving from top to bottom using straight, parallel strokes that overlap. When the surface of the sponge becomes sooty, simply skim it off with a knife to give the sponge a new cleaning surface. Dry-cleaning sponges aren’t recommended for oil-based paint, acrylic paint or vinyl wallpaper, or for removing the greasy soot sometimes left by kitchen fires.

    5. Instead, use a regular sponge and pine-scented cleaner. Be sure to remove all the soot. The more you get rid of, the faster the smoke smell will dissipate.

    6. Even if the damage is heavy and you have filed a claim with your insurance company, you’ll still have a mess on your hands. Fortunately, there are services that specialize in post fire cleanup work. Check the yellow pages, under “Fire & Water Damage Restoration.” You can also contact several organizations that provide references.

    7. Professionals are especially skilled at eliminating the smoky odor that lingers after a fire. Their cleanup arsenal includes ozone generators and special deodorizing chemicals.  Ozone can harm your lungs, and the EPA warns against using ozone generators in occupied spaces, so leave this step to the professionals.

    8. After a serious fire, you might have to move out of the house during cleanup and repairs. If so, be sure to board up broken windows and other holes. Remove any valuables you can. Consider hiring a security service to keep an eye on your home.

  • How to Catch a Mouse

    How to Catch a Mouse

    How to Catch a Mouse

    Eeeeeek, there’s a mouse in the house. Well don’t worry, you can safely remove the little creatures from your home and return them to the great outdoors without any harm.

    1. You will usually find them somewhere in the kitchen at night, no doubt looking for food.

    2. Place an empty plastic garbage can (at least two feet high) or other suitable container under the pipes of your kitchen sink.

    3. Place a small amount of food (lettuce, cheese, etc.) into the garbage can. Do not put a bag in the can, just leave it empty so they can’t climb out.

    4. The mouse or mice will climb along the pipes above the garbage can and drop down into it. They don’t jump very well, so they won’t be able to escape as long as they have nothing to climb up.

    5. When you wake up in the morning, simply take the whole garbage can containing your new friends outside and set them free.

    6. It’s a good idea to take them at least a half mile away, so they don’t come back, and try not to release them near other homes.

    7. Take a good look at them when they are captured. They’re actually pretty cute and harmless.

  • How to Swim: A Beginner’s Guide

    How to Swim: A Beginner’s Guide

    Learn How to Swim With This Easy Guide

    It is often said that swimming and cycling once learnt never forgotten but for that, you need to know how to swim properly. Swimming is one of the all round best activities that can be both recreational as well as useful. Its great for people of all ages and that is why nowadays you will find that most people are queuing up to admit themselves in swimming classes. Swimming is used as a rehabilitation therapy, as water supports your body, works all the major muscle groups, gets your heart pumping, and puts little stress on your knees and joints.

    Some basic steps of how to swim

    Most of the parents want their baby to learn to swim realizing its usefulness. Swimming is not an uphill task. It is really easy and engaging. Once you get the hang of swimming, you will discover it interesting enough. Do not get frightened or do not worry about drowning, just have confidence. Keep in mind that your body is less dense than water; ultimately, you will float on water. Here’s some handpicked steps helping you to learn how to swim.

    As a first step of learning how to swim, you need to get into the water holding the side of the pool. Make sure that your baby can hold the wall at the side of the pool. Allow your head to get under the water but remember how to hold breath.

    Secondly, try to grab on to side of the pool and let your legs float out behind you. Start throwing your feet and get a feel of how it is done.

    Now proceed to third step, slightly jump off the ground and bring your right arm in front of you. Now cup your hand and push your arm through the water. Repeat the process with your other arm and at the same time kick your feet to help you move forward and faster.

    Finally, if your arms get tired or if you get exhausted just do not panic. Let your arms float out to your sides, and let your feet float out in front of you. Flip over onto your back and float.

    So, what are you waiting for? If you really want to teach your baby how to swim, just cast a glance at these above-mentioned steps and learn how to swim and enjoy the fun to show off your swimming tricks at the public school and other competitions.

  • At-Home Spa Day: Pamper Yourself and Cut Facial Shine

    Tips to Pamper Yourself and to Calm your Stressed Out Mind & Body

    Chances are you don’t take care of yourself enough. How could you? There are only 24 hours available in each day. You pack a lot of activity and responsibility into those hours, usually meeting someone else’s demands. Be it your boss, your business, your kids, your lover, you always seem to come last. Well, it’s about time you start taking care of yourself. It’s for your own good.

    1. Take one whole day off and be totally alone. Don’t worry, you’ll be in good company.

    2. During your free day, do your “thing,” whatever it is.

    3. Do nothing. Do everything. As long as it’s totally your idea, it’s OK.

    4. This step involves money. Either make some, spend some or save some, just for you. This isn’t being greedy. It just helps you feel your power.

    5. Later on you can give it away, burn it, keep it, whatever, it doesn’t really matter. As long as the decision is yours, you’ll feel good.

    6. Do one small thing to improve your health. Good health is some of the best pampering.

    7. What is that one outrageous luxury you want? Whatever it is, start planning on having it and take one small baby-step towards getting it. No matter how big or small that outrageous luxury is, the process of planning is half the fun.

    8. Just say NO! Learn to say “no” when the answer should be “no.” Stop heaping more and more things on your plate just because you can’t say “no” to others.

    9. Look good. Whatever looking good means to you. Stop doing something you’ve always done, start doing something you’d thought you would never try.

    10. Smell good. There’s not much in our environment we can totally control. How we smell happens to be one we can.

    11. Laugh! Really laugh! It feels good. Do we really want to be so serious ALL the time? Lighten up on yourself and others.

    12. Be your own best friend. Why? Because best friends can be so forgiving.


    Remove Facial Shine – How to Have a Glowing Shine Free Face

    Many people with oily skin normally powder their face frequently during the day, absorbing oils, which temporarily reduces the shine. However, here is a remedy that may prevent that facial shine without the frequency of powdering.

    1. Buy Swiss Kriss Herbal Laxative from a health store.

    2. Boil approximately two to three quarts of water in a large pot and two tablespoons of Swiss Kriss.

    3. Once the water reaches boiling, turn the heat off the stove.

    4. Remove the pot from the stove and onto a cutting board or protective surface to prevent scorching or surface burning.

    5. Place your head over the steam at a safe distance to prevent burning your face for one to three minutes.

    6. Rinse your face with cold water.

    7. If done once or twice a week it will open the pores and remove the excess oils.

  • How to Name Your Business

    How to Name your Business – choose one that will work now–and in the future.

    If you are like most small business owners, your company means a great deal to you. In some ways, you even consider it your “baby.” You’ve planned for it since its conception, nurtured it from birth, given it tender loving care, and have great hope for its future. It makes sense to name your business with the same care that you would name a child.

    1. Make the name a marketing tool. Avoid vague names by thinking about the key focus of your business. “Pat’s Carpentry Services” is more descriptive than “ABC Industries.”

    2. Some people like to include their first or last names in their business names. This can help personalize your product or service, and it is easier to avoid conflicts with a business name that includes your personal name. However, you risk a “bad” name if your business fails. 3. Make sure the name is easy to understand and pronounce. You want your business name to be passed along easily by word-of-mouth. Oh, “Kolias” is pronounced “cole-e-us”, like the plant.

    4. Those with unusual names know this can present a challenge but can also provide for a memorable business name, once people have it in their minds.

    5. Shorter names are usually more memorable and less likely to be sources of confusion. 6. Choose a name that you can live and grow with. Be forward-thinking in your choice of a business name, so it can expand as you do. The name “City VCR Repair” can limit a business that wants to expand to include laser disc players, camcorders, or other electronics equipment. 7. Choose a name that is broad enough to give your business “growing room” and narrow enough to retain the power to communicate its focus. 8. Make sure the name will outlast current fads or trends. Twenty years ago “Jan’s Groovy Clothing Design” may have sounded cool. (Actually, it still sounds kind of cool).

    9. Make the name unique. As a small business owner, you will be required to file legal forms indicating your business intent and the fictitious name you’ve chosen. Your name must also be unique, since two businesses in the same geographic area cannot legally operate under the same name. 10. It is a good idea to prepare a list of three or four alternate names when you go to file, in case your first choice is taken. 11. Try it on for size. In choosing a business name, jot down a list of possibilities and try them out on friends and family. 12. Do not rush the process. Live with each possibility for awhile. Remember, you’ll probably be using this name for quite some time. 13. Naming a business is not always easy, but it can be fun. Choose a name that will provide a good image and will communicate your business purpose clearly.

    14. Make sure you like it. After all, you will be spending a lot of time with this “baby.”

    By selecting wisely, you will make your business name a valuable company asset and a phrase you will say with pride for many years to come.

  • How to Be a Successful Leader

    How to Be a Successful Leader

    All good leaders have this in common, positive self-esteem. It is vital to your success as a business person and a human being. You must feel good about yourself to accomplish great things and have control over your life.

    1. Goals are the means to use to reach your dreams. Do not make your goals unrealistic.

    2. Use small successes to generate larger ones.

    3. Keep pushing yourself to allow you to reach your full potential. There is a price to pay to be successful, and that price is hard work. Do not be afraid of it.

    4. Being positive is an attitude that can be controlled by you.

    5. Surround yourself with positive people and block out all the negative ones you come in contact with.

    6. Good habits should be second nature.

    7. Make sure that every day you are in control. Be focused and don’t put things off until tomorrow. It can be a bad habit.

    8. Communicating is a powerful force, and that doesn’t mean you should be doing all the talking. You must listen.

    9. How you relate to people in your business is extremely important. Treat them with respect.

    10. A good leader will learn from others. Do not allow your ego stop you from seeking advice from people that have been there before you. Learn from their mistakes.

    11. Pressure and stress are two different animals. Pressure makes a person more focused. Stress robs you of it and harms your performance.

    12. Anyone can be great for a short time, but to be successful over the duration of your life, you must be persistent. The essence of persistence is not to quit. Take it out of your vocabulary.

    13. How you handle adversity is a sign of your maturity. Do not be afraid of it, meet it head on and take immediate action, because it won’t go away by itself.

    14. If you fail, accept it. You learn by failure and you’ll be better prepared and wiser the next time around.

    15. Keep striving for excellence.

  • Teaching Kids to Save Money

    Teaching Kids to Save Money

    Teaching Kids to Save – Some Important Habits to Start Early.

    You will do your children a big favor by teaching them the value of money if you give them an allowance in return for chores. They will learn the importance of saving towards future goals and gain the self discipline and skills that so many people lack in today’s society.

    1. Start an allowance when a child starts elementary school. School signals the beginning of important responsibilities for children.

    2. Set a specific time when money is distributed and stick to it (just like the real world). Being late implies it’s OK to be irresponsible.

    3. Distribute allowance at the beginning or middle of the week. Most kids spend most of their money on the weekends. Giving early in the week forces them to think about how they’ll spend it later.

    4. Make the allowance large enough so that some of it can be saved. It will also give the child an opportunity to develop a need to save.

    5. As children get older, increase their allowance and what it should cover. This gives them more experience managing larger sums of money to make choices about how to spend it.

    6. Consider your income when deciding how much to give. But here are general “salaries” per week:

    ° Ages 6-8, $2.00

    ° Ages 9-11, $4.00

    ° Ages 12-13, $7.00

    ° Ages 14-15, $11.00

    ° Ages 16-17, $14.00

  • How to Change Your Motor Oil

    Learn How to Safely Change Your Motor Oil

    Want to know the easiest way to extend the life of your car? That’s right, changing

    the oil on schedule is the most important thing you could ever do. And now, you can do it yourself. You can

    change the oil and filter in you and your spouse’s car for about $30 to $90 and 30 minutes of your time, depending on the oil and filters you choose.

    1. Buy yourself a case (12 quarts) of motor oil and two filters from any local store selling automotive

    items. They will have manuals to help you choose the proper filter for your car. As for the oil, buy the cheapest

    brand available. BUT, make sure the oil is API (American Petroleum Institute) certified. All certified oils will

    say so on the label.

    2. Grab an old pair of jeans and crawl under the front of your car. You will notice a relatively large tank with

    a bolt protruding from the bottom or side of it. That’s the oil tank.

    3. Place a shallow pan (wide enough to hold 4 or 5 quarts) under the discharge bolt of the tank.

    4. Remove the bolt making sure not to round the edges. If you do round the edges of the bolt, use a vise grip in

    the future.

    5. Drain all of the oil from the tank. It will easily flow out into the pan you placed under the tank.

    6. Screw the bolt back in, making sure it is good and tight.

    7. Now, locate the oil filter. It is normally within easy access somewhere on the side of your engine.

    8. You will need a filter wrench to remove the filter. They are pretty inexpensive.

    9. Place the filter wrench around the filter, and gently rotate in a counter-clockwise direction.

    10. Remove the filter. There is oil in the filter, so try to pour it inside the pan under the car.

    11. Screw in the new filter. This time rotating in a clockwise direction. DO NOT over-tighten. Once the filter

    makes contact with the engine, only rotate an additional 3/4 turn.

    12. Pour the new oil into the engine. The cap is located on the top of your engine, usually marked “oil.”

    Check your owners manual for the proper amount, normally 4-5 quarts.

    13. After you add all the new oil, check the dipstick to assure the proper amount has been added.

    14. Check under the car for any leaks.

    15. Start the engine and check for leaks again.

    16. Dispose of the oil at your local gas station or auto parts store. NEVER throw used oil in drains or anywhere

    else where it is harmful to the environment.

    17. Note the mileage on the car and repeat at the interval in your owner’s manual.  Many newer cars call for 5,000 to 7,500 miles, and some full synthetic oils last longer.