Stuffed Christmas Tree – Warm your Home with Cozy Holiday Charm
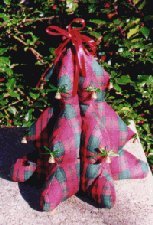
This is a nice little Christmas tree that can be made for table top decorations. It can be made as a gift or for use in your own home. The tree is easy to make, costs very little in material, and will last for many Christmas seasons.
Materials:
¾ of a yard of material of your choice.
One bag of polyester fiberfill.
Needle and thread.
Scissors.
Tree decoration – ribbon, small ornaments or bells.
Glue gun.
1. Make a pattern in the shape of a Christmas tree.
2. Fold the material in half, long ways, with the right sides of the material together. Then fold the material, short ways, in equal sections of 1/3. This will give a material pile of six sections.
3. Place the pattern on the material and pin the pattern to the material.
4. Cut the pattern out along the edge.
5. Remove the pins and place the pattern aside.
6. Take two pieces of the cut out pattern and put two sides of the correct side of the material together and pin. Follow this same procedure for the remainder of the material pieces. You will end up with three separate pinned material pieces.
7. Begin sewing the tree panels together. Start from the bottom and sew upwards leaving a three inch opening at the bottom. Follow this procedure for all three panels.
8. Once the panels are sewn together, turn them inside out.
9. Press, with an iron, the bottom edges inside, so that they form a complete tree. The edges that were ironed in, will be stitched by hand once al the panels are sewn together.
10. Place all three panels together and pin. Make sure that they are even with each other.
11. Sew all three panels together starting from the bottom of the base of the tree sewing upward.
12. Now it’s time to stuff the tree. There are six open panels, at the bottom, which all need to be stuffed with the fiberfill. A wooden spoon is a good tool to use in stuffing the panels.
13. Once a panel is stuffed, sew it by hand and close the opening. Follow this procedure for all six panels.
14. Now that your tree is completed, decorate it in any fashion imaginable. Be creative!! Happy tree trimming.
Easy to Make Stuffed Snowman – Decorate Your Home with Cheer!
Making crafts are a wonderful way to spend a day at home. They bring out the creativity in a person and give great satisfaction when completed. Here is a little snowman you can make on one of those days at home. This little guy doesn’t take very long to make and the materials needed should only cost pennies. Once he is completed, he can be an ornament on a Christmas tree, used to decorate gifts, or he can be put on the refrigerator by gluing a magnet to his back.
Materials
Two 5″ X 5″ pieces of material of your choice (white’s always good) for the body of Mr. Snowman.
1 sheet of black felt.
1 tooth pick.
5 small pieces of broken up asphalt (just pick them out of a driveway paved.
2 twigs shaped in a “Y” (hands).
Small amount of fiber fill to stuff Mr. Snowman.
1 strip of material of your choice for the scarf. It should measure about 1″ X 8″ (fringe the bottom of the long edges).
Glue gun.
Needle and thread.
Orange paint (you can use nail polish, if you can find orange that is).
Elmers glue.
Scissors.
Pointed object as in a nut opener or a pen that has run out of ink.
1. Order the pattern, or make your own.
2. Take the material and put the right sides together facing each other. Place the pattern on the material, pin it, and cut the pattern out.
3. Remove the pattern and re-pin the material. Sew the material together, 1/2″ from the edge of the material leaving a 1″ opening at the top of the head. This is where the fiber fill is stuffed to shape Mr. Snowman.
4. Once the material is sewn together, turn the material inside out. A wooden spoon is a good tool to use to push the material inside out through the head opening. Once the material is inside out, begin stuffing the fiber fill via the head opening. The wooden spoon can be used here too to push the fiber fill into the body. Once Mr. Snowman is completely stuffed, sew the opening at the top of the head closed.
5. Cut the pattern out for the hat. The hat can be a little tricky to glue together, but be patient and it will turn out fine.
6. Using Elmers glue, put a thin coating around the perimeter of the small circle (top of the hat). Take the strip of black felt and glue the long edge to the perimeter of the hat going all around. Then glue the edge down together of the long strip. This will form the top hat.
7. Now put a thin coat of glue around the perimeter of the bottom of the long strip (top hat), which is now circular. Place the top of the hat on the brim (larger circle). Try to line it up even so the brim is the same size all around. Let dry.
8. Once the hat is dry, using a pair of scissors, cut a round opening in the bottom of the hat, so that it can be placed on Mr. Snowman. The easiest way to do this is to bend the hat in such a way that an “x” is cut out. Then simply insert the scissors in the opening and cut around.
9. Cut the tooth pick to measure about 1/2″ and paint it orange. Let it dry.
10. Time to decorate Mr. Snowman. With the pointed object, push a hole into the side of the middle body part between the seem. The opening is being created so that the arms (twigs) can be easily inserted.
11. With a hot glue gun, put a small amount of glue in the opening and insert the arm. Follow the same procedure on the other arm.
12. Now glue the top hat onto Mr. Snowman.
13. Using judgment, decide where the nose should go. Use the pointed object and create a small hole opening for the nose. Put a small amount of glue in the opening and then insert the tooth pick.
14. All that’s left to do is glue three buttons on the center base of Mr. Snowman and glue his two eyes on (us the small pieces of asphalt). Wrap the scarf around his neck and tie. To keep the scarf from moving around, glue it to the body of Mr. Snowman.
15. To hang him from a Christmas tree, simply sew a loop into the top of the hat and use an ornament hook. Another idea is to glue a small magnet to the back of Mr. Snowman. This way he can be attached to the refrigerator at home or on a file cabinet at work.

How to Make a Gingerbread Man Ornament
These little men even smell good! This is the perfect ornament every Christmas tree should be trimmed with. They are easy to make, but are a little expensive. The reason being, the cost of the cloves. If you don’t mind spending a little extra money to create a wonderfully smelling ornament, this is the way to go.
Materials Six Tbs. Applesauce.
Ten Tbs. Cinnamon.
One Tsp. Cloves .
One Bundle of string.
1. Combine all ingredients to form a dough.
2. Roll out the dough to about 1/8th of an inch in thickness.
3. Cut the dough out with a gingerbread cookie cutter.
4. Slightly grease a cookie sheet with PAM, and then place the gingerbread men on the cookie sheet.
5. Poke small holes in the hands of the gingerbread men with a tooth pick to create openings.
6. Bake at 120 degrees for approximately one and a half hours.
7. Turn off the oven and leave the gingerbread men in the oven over night to allow them to dry.
8. Once dry, begin to decorate your gingerbread men. Use your Imagination!
9. Now it’s time to string these little guys together. Insert the string into the hand holes and tie a knot behind the hand. Do this for every hand until you get to the end hand.
10. Once you get to the end hand, pull the string all the way through. Form a loop and then tie the loop at the end of the hand. Leave about three inches of string extending from the end of the hand and then tie the string off at the end with a knot.
11. You can make the ornament as long as you like. Or you can make only three gingerbread men tied together, which makes a great Christmas gift for a friend or a work associate.